Ford Pop / Anglia / Fordson Mastering and Casting
As far as I know, there's not a Ford Pop available in 1/32 scale, or anything that can really be chopped to shape. So, as I really wanted to do a Pop hot rod to begin with, as left above, I had to do a full ground-up scratch build.

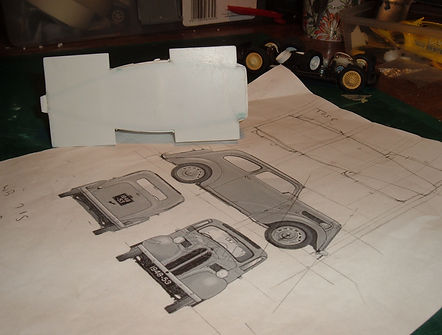
I found this 3-view drawing on the Web, scaled it down to 1/32, and extrapolated the missing view i.e. the overhead plan. I then cut a 30-thou plastic card plate to the shape of the overhead plan, as a baseplate to build up from.
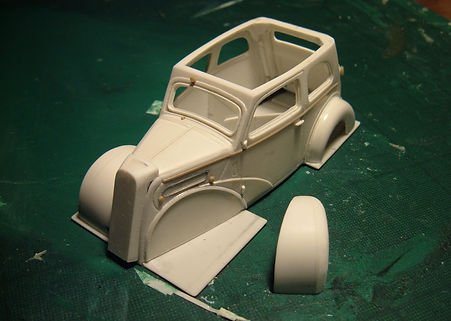
The body is in the process of being built up. I started with the two sides, taken from the plan and stretched a little to allow for the outwards curvature, and notched above the waistline to allow the windows to lean in a bit - cut from 60-thou plastic card. Then other panels have been successively added, using 30/40/60/80-thou card, or more by laminating thicknesses together. The front wheel arches are still loose, requiring a bit more shaping, and the radiator grille area is still a billet of plastic needing final shaping. I've also been adding some detail as I go along - hinges, handles, panel lines, trim lines, window frames, rear number plate, filler cap etc.
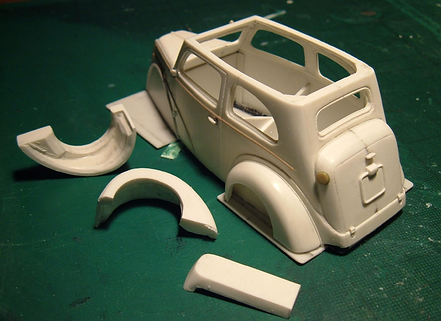
Pretty much there now on the body, bar details like lights. Now fitted to a chassis, which allowed the wheel arches to be finally shaped using the wheels as a guide, and the arches also lipped.
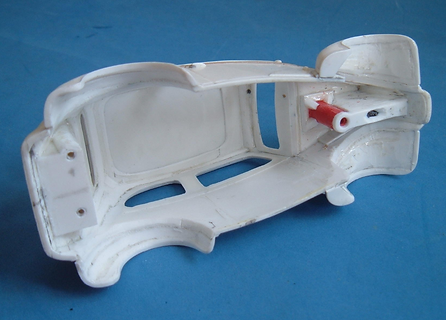
Inside, I've disposed of the internal props used to hold the body in shape while I was building it up, and also started to grind out & round off the excess plastic inside, like in the wheel arches. I've now added dual-purpose chassis mounts, in that the basic blocks at the front & back are set up for a PCS32 chassis, though the mounts do also have an extra post at the front, and offset holes at the back to fit my custom chassis.


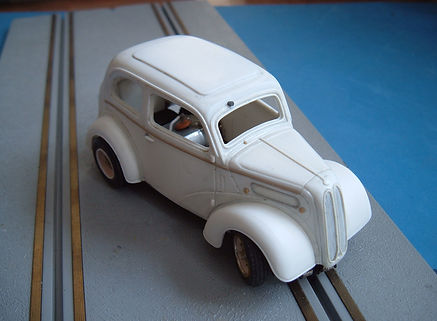
A quick shot of Humbrol spray primer - brings it all together ! And it's a good base to show up any imperfections that need fixing. Also some final detailing at the rear - choice of two filler caps, a 'custom' one on the top of the boot, and the standard production one low down on the side of the boot. Also standard production rear lights, and additional indicators. And I've added a little detail on the inside - door panelling and door handles / window winders.

So, to mould making.... two-part 'buck' mould made from silicone rubber, with an extended skirt at the bottom to allow a bit of extra when casting, plus interlocking 'legs' to align and correctly space the two parts.

Here's the two parts socketed together ready to cast. The blue bit is a funnel to pour the resin in to -under it, there's a tube goes down to the bottom of the mould, so the resin will fill from the bottom up when poured, to minimise air bubbles and to max the chance of all the detail being filled properly.

And so to casting........
It works ! I've used a slower cure 2-part resin, to give me time to smear some resin in to the details first, before pouring the bulk in.
The shell front left has had most of the 'flash' trimmed off. Yes, there are a few air bubbles in the resin, and the odd bit of 'short shot' detail; this'll be fixed later with some Isopon P38 two-part car resin.
Fordson Van version
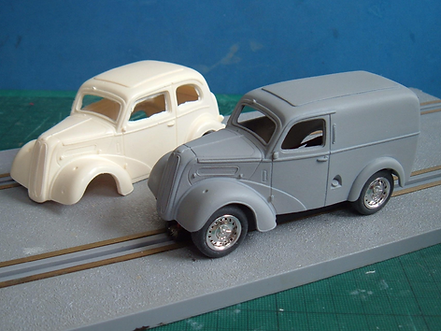
Simply, I took one of the Pop shells, cut it vertically a few mm in front of the trailing door shut line ( as the van doors are narrower), chopped the remainder of the side window frames from what was left, shortened & reinserted those bits to the doors, and also moved the door handles.
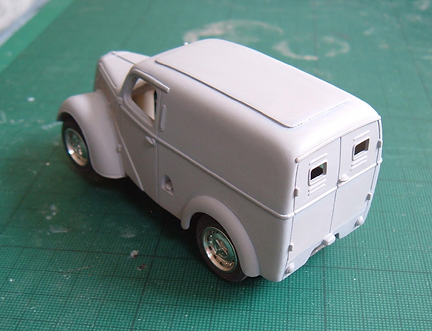
Then I epoxied & pinned a sheet of plastic card to back of the cut-off front, built the rear box on to it, and then filed to shape and detailed it. A lot of fiddly detail on the rear - doors, windows, louvres, hinges, handle, lights, recessed fuel cap in the flank.
A two-part silicone rubber mould has been made from it, similar to the one for the Pop illustrated above.
Extra Detail Parts
Vac-formed Glazing
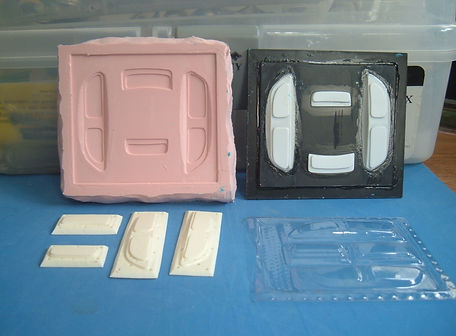
OK, thought I'd have a go at vacforming for the glazing, So, back right are the masters I made up from plastic card, then a rubber mould of these top left, then resin castings bottom left ( with some extra vent holes drilled in ), then bottom right is a print, ready to go.

And here's the machine to do the vac forms - a Vac-U-Form, converted to take a domestic hoover pipe for the vacuum.